n
anonymousdoortablet/dthelp.nsfg-suite-2-legged
Protected content
| 244pages | Our help system contains many pages and videos for you to consume. This includes the complete information on how Door Tablet works, all its features and options, and of course the many benefits for your business. Door Tablet School offers many videos too. |
|
 |
| 
Click on images to see them in full screen
000A5B0A535978CE8025842F005223A72L Authentication
Note: this method is now withdrawn and you will have to use 3-legged Authentication. See here 
2-legged Authentication is required to allow the Door Tablet server to authenticate with Google G Suite and access your data. The 2 legged option requires a Domain Wide access. To use a stricter access method use 3-legged authentication as it is a user specific access to data.
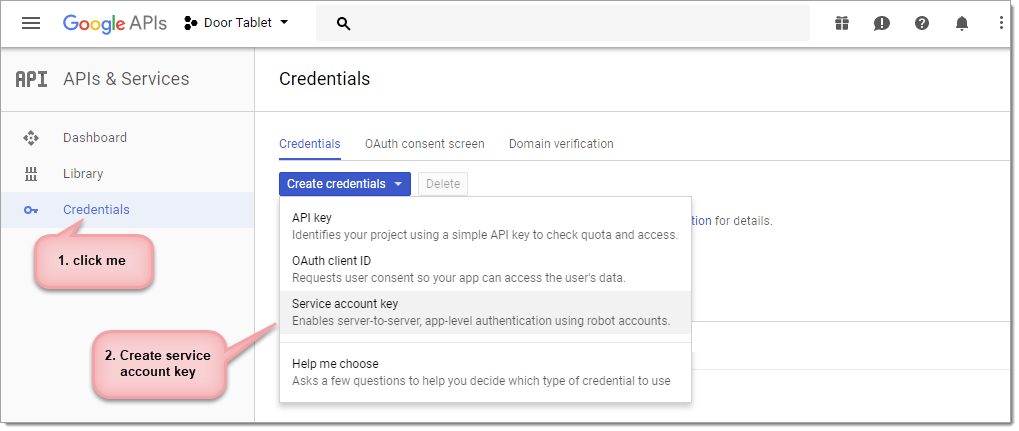
We are now ready to obtain two of the items required for Door Tablet. Click on Credentials and Create new Client ID
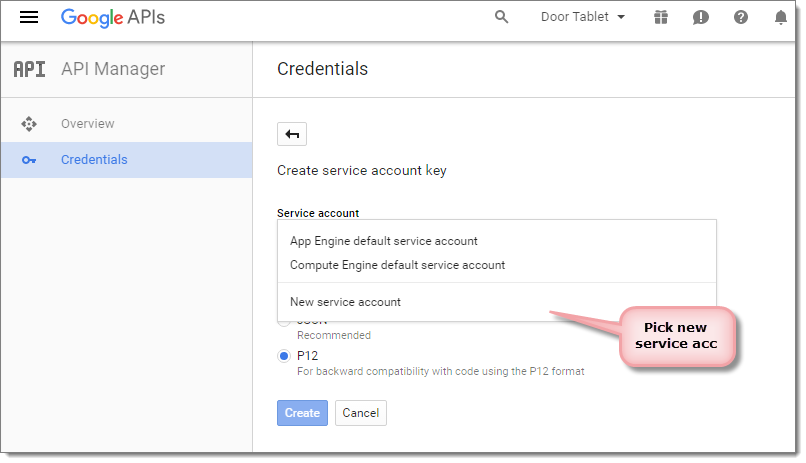
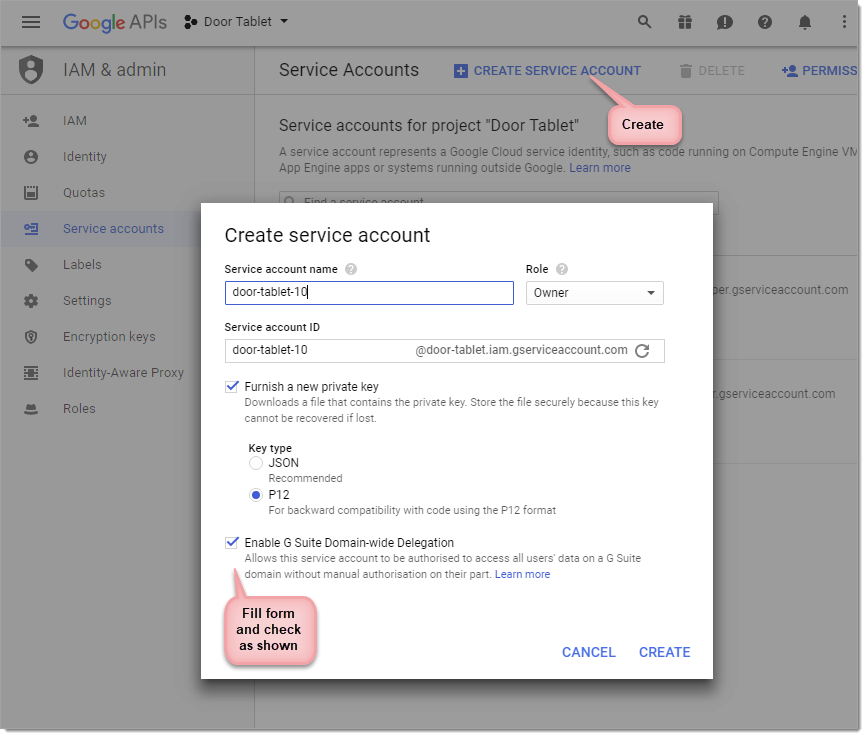
We will now create a Service Account:
We now create a service account key:
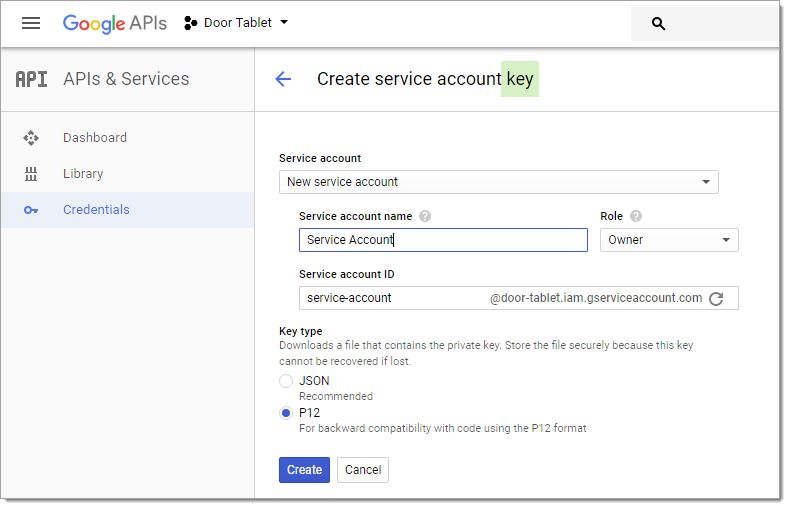
Note: The Service Account key is now ready and you are prompted to save your Private Key file (P12), you will NOT need this P12 file for use in Door Tablet.
You can review the service account by clicking "Manage service accounts"
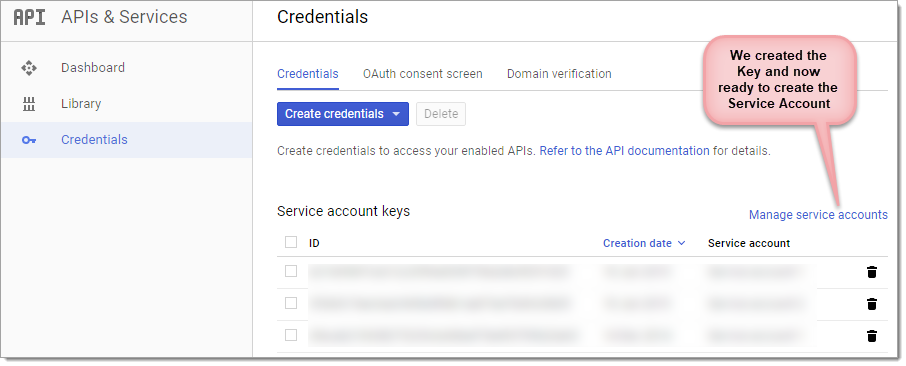
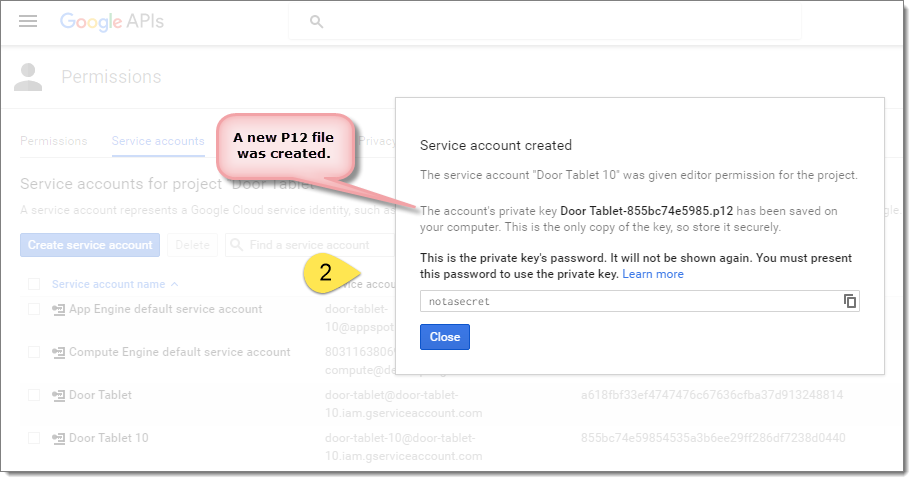
Showing the Service account key. You are now ready to create a Service Account:
The P12 file you saved here will be required by Door Tablet, marked as item 2 (at the very end of this document).

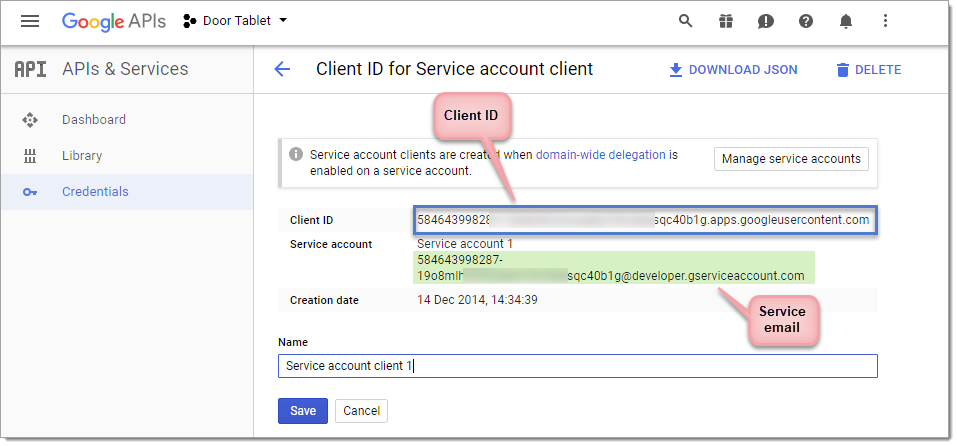
We will now need to pick the Client ID from the Service account.
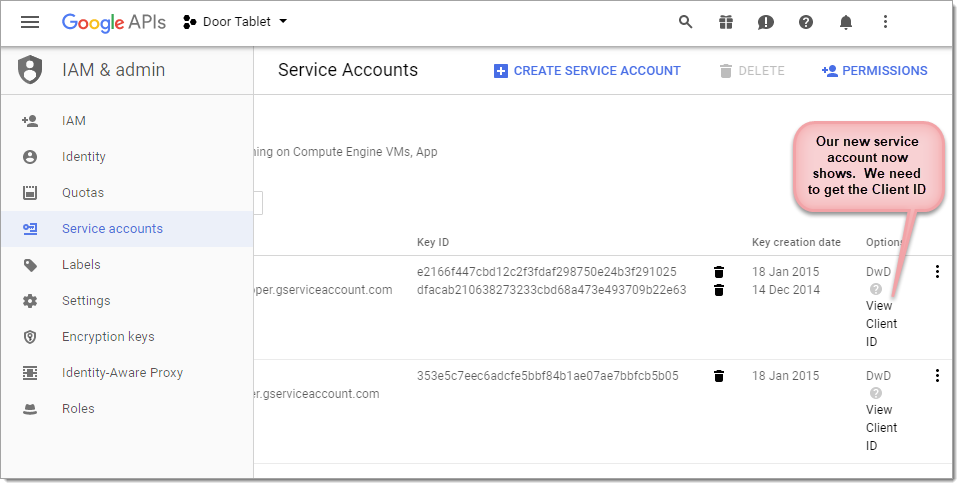
When you click on View Client ID the following will show.
The Service account email showing here will be required by Door Tablet, marked as item 1 (at the very end of this document).

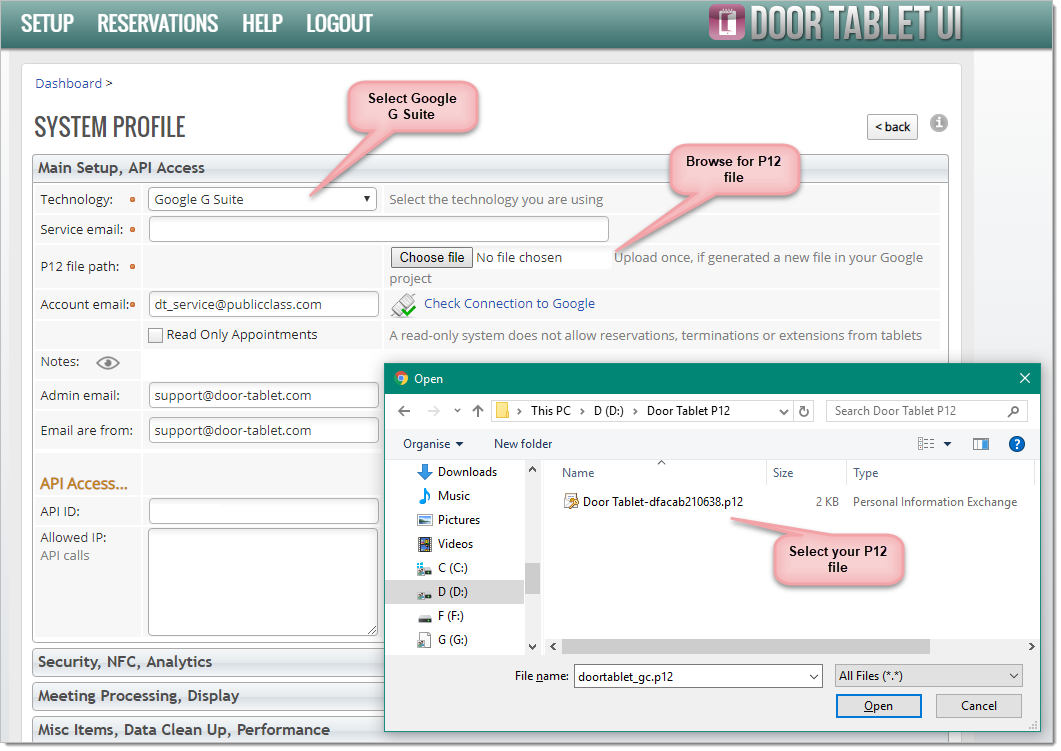
The system profile opens, ready for your update. Note the following:
In order to authenticate with your Google G Suite project, a P12 file that you have obtained while preparing Google Calendar is required to be placed on the server. The System Profile allows you to perform this task as follows:
- Select the technology used, Google G Suite
- You will see the file upload control, use to it select your P12 file
- Save the system profile
 Before you continue, submit the form to ensure the P12 file is placed in the correct folder.
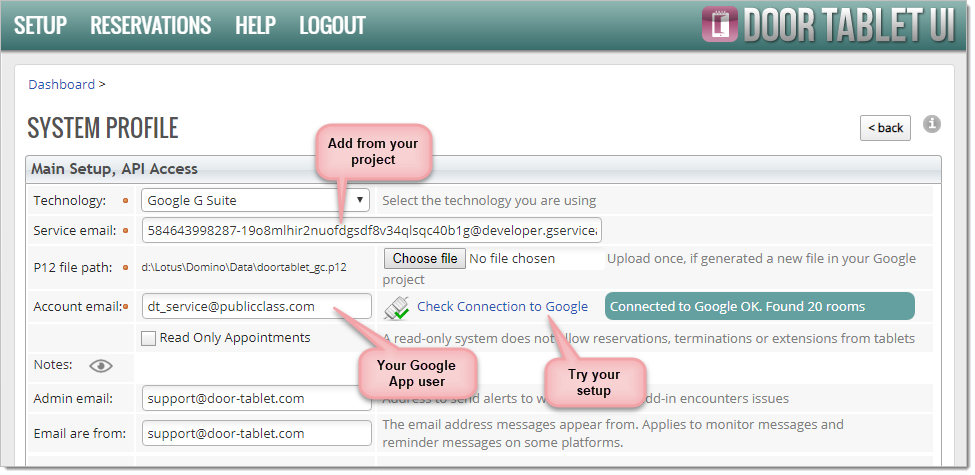
 Your are now ready to re-open the system profile and add the rest of the details:
- Enter the Service email. It Looks like this 584643998287-19o8mlhir2nuoa6a7r8v34qlsqc4xcvh@developer.gserviceaccount.com
- Enter the account user email
- You are now ready to test the connection to Google G Suite
If you have not done so yet, please prepare Google G Suite for running Door Tablet where you will obtain the above data. See
 Save the System Profile
You are now ready to open Door Tablet clients which are connected to Google G Suite
Setting the Door Tablet server to connect Google
Save the System Profile
You are now ready to open Door Tablet clients which are connected to Google G Suite
Setting the Door Tablet server to connect Google
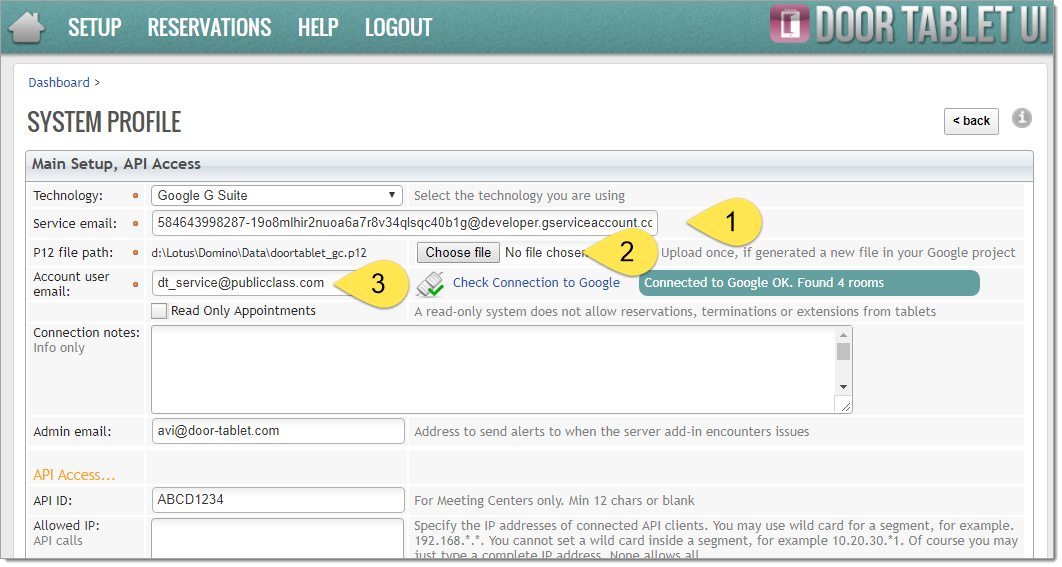
- Open the system profile and fill the three items as shown
- Before you test your connection for the first time, save the profile
- Open the system profile again and click on Check Connection to Google
- You can now go to one of the space view and hit Synchronise
Pat your self on the back - you are done
 When you hit on the Synchronise button Door Tablet will connect to Google and get all your rooms.
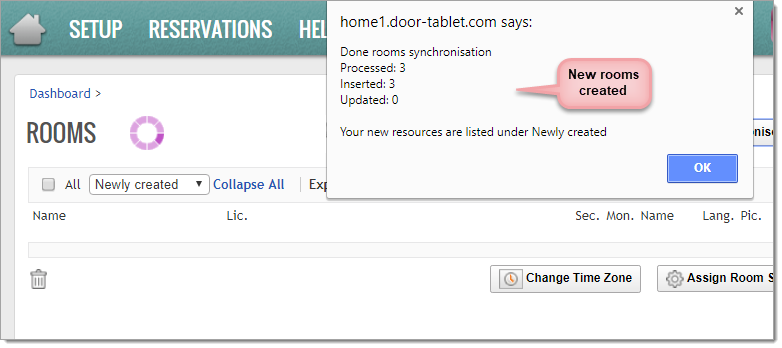 Result:
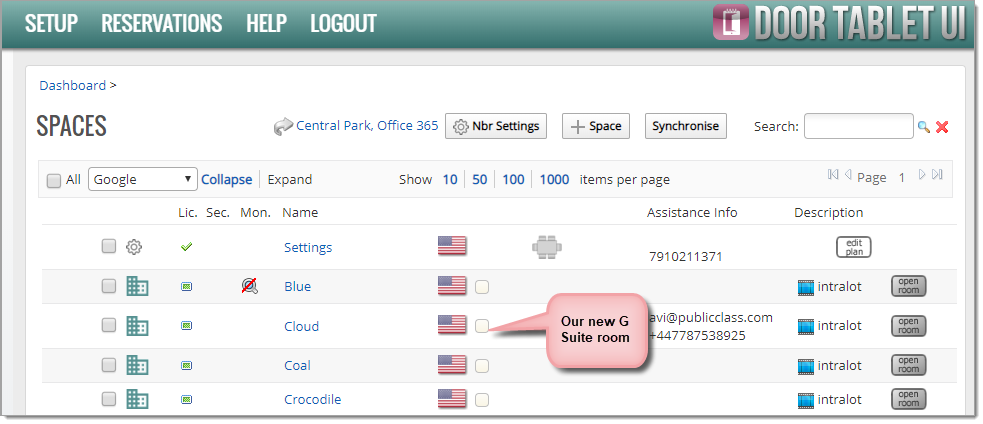 You are now able to open each meeting space, activate and configure as you see fit.
Adding rooms later
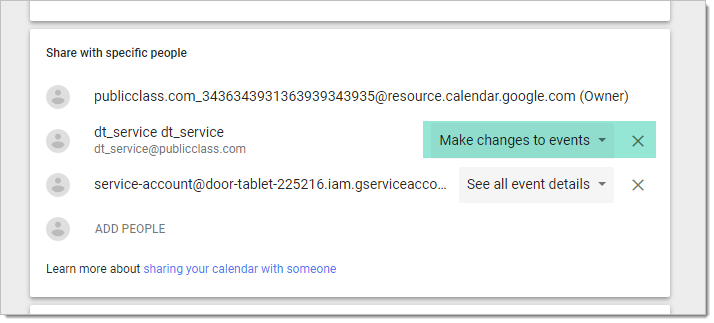
You can add meeting space and easily introduce them to Door Tablet. Back in your calendar, set the calendars to be shared with the service account. If you did not pay attention you will not give the service account enough permission to update events:
You are now able to open each meeting space, activate and configure as you see fit.
Adding rooms later
You can add meeting space and easily introduce them to Door Tablet. Back in your calendar, set the calendars to be shared with the service account. If you did not pay attention you will not give the service account enough permission to update events:
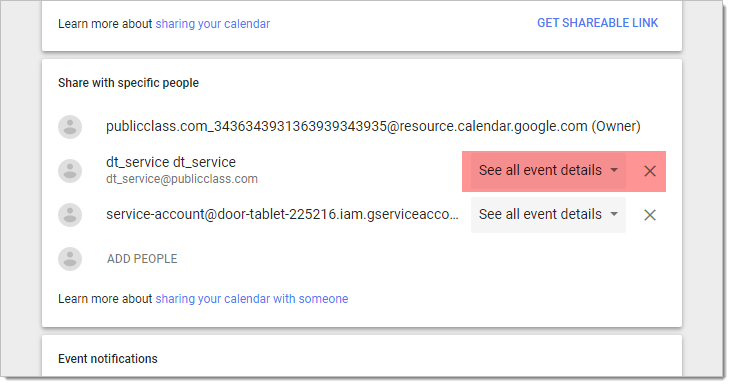 In such a case, you need to update the entry. If you can edit the entry, remove it and add it again:
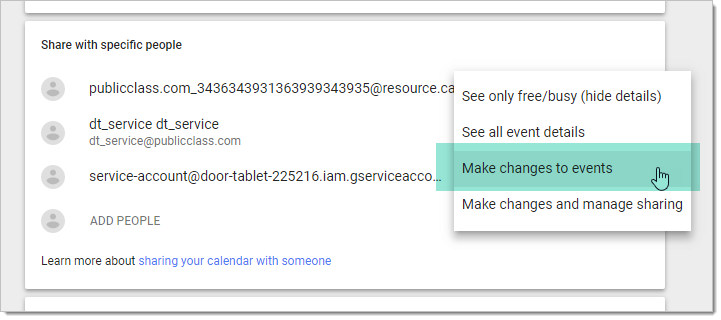 And the result: