Click on images to see them in full screen
5E1EE90BF29448FF80257FA8006BE804Floor Plan
From Door Tablet V7.6, it is possible to create an interactive Floor plan for desks, meeting spaces and any other resource you can reserve in your business.
From Door Tablet V8.1 you can switch floors on the same display and add a key to the display. See images at the bottom of this document.
To implement a Floor plan display, the following steps are required:
- Identify the available dimensions of your actual display
- Create a Floor plan image (check out https://www.smartdraw.com)
- Upload the above image to a neighbourhood settings document
- Edit the Floor plan map to link resources to map areas
- Open the neighbourhood in the Door Tablet App and select Floor plan
VIDEO: Floor plan display
Identify the available dimensions
To optimise the design of your display it is recommended that you create your Floor plans closest to the dimensions offered by your display. If you do not have the display you may estimate it and adjust it later.
The simplest way to do this is to upload an image to the neighborhood settings document, add one mapping and then view it on the display. For around ten seconds the display will report dimensions of both what is available and what you have uploaded. You can use that information to adjust your image. Note: Door Tablet will scale your image without distortion, taking full advantage of either the available width or height of the display.

Interacting with your Floor plan
When a user engages with a room in an interactive display, such as the Floor plan all the business rules set in the room will apply.
VIDEO: Setting up key business rules
Save a Floor plan image
Open the Settings record for the neighborhood, or create a new one, as follows:
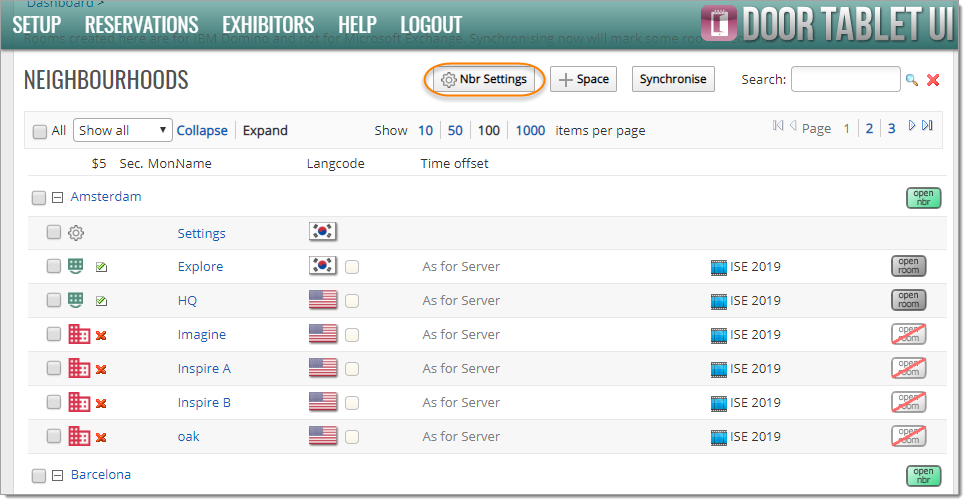
Add a Floor plan image under "Wayfinding Displays, URL Invocation":
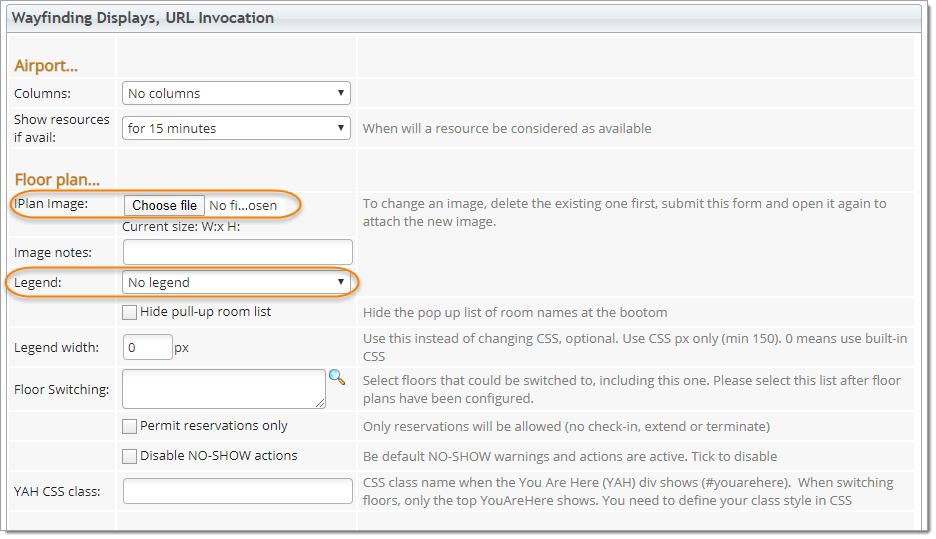
Note: if you wish to change the image you uploaded to Door Tablet, delete the current one and save the record first. After uploading a new image refresh the page to ensure you see the latest image.
Map resources to elements in your plan
Once you save a Floor plan image the following button will show in the Neighbourhood view:
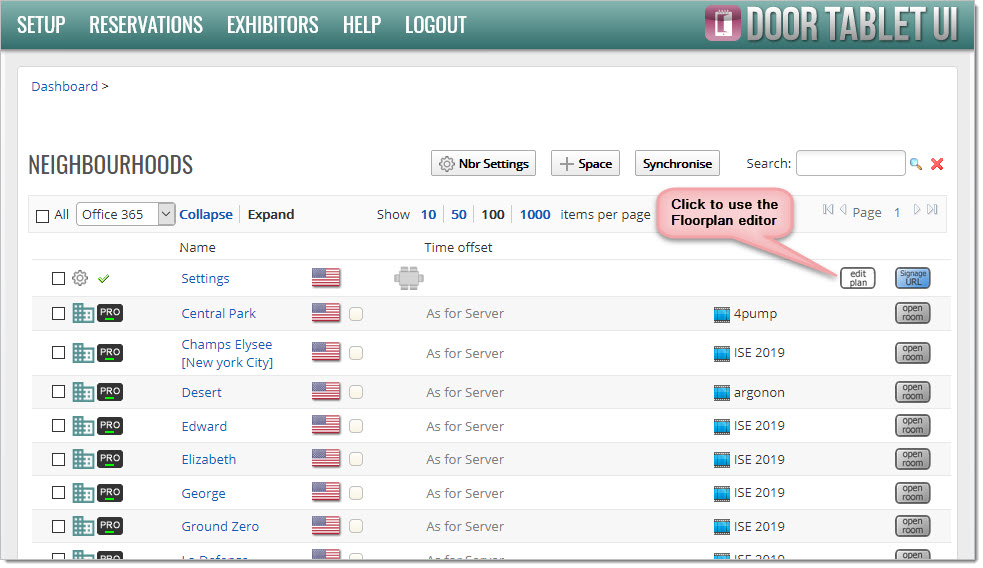
Linking resources and image areas:
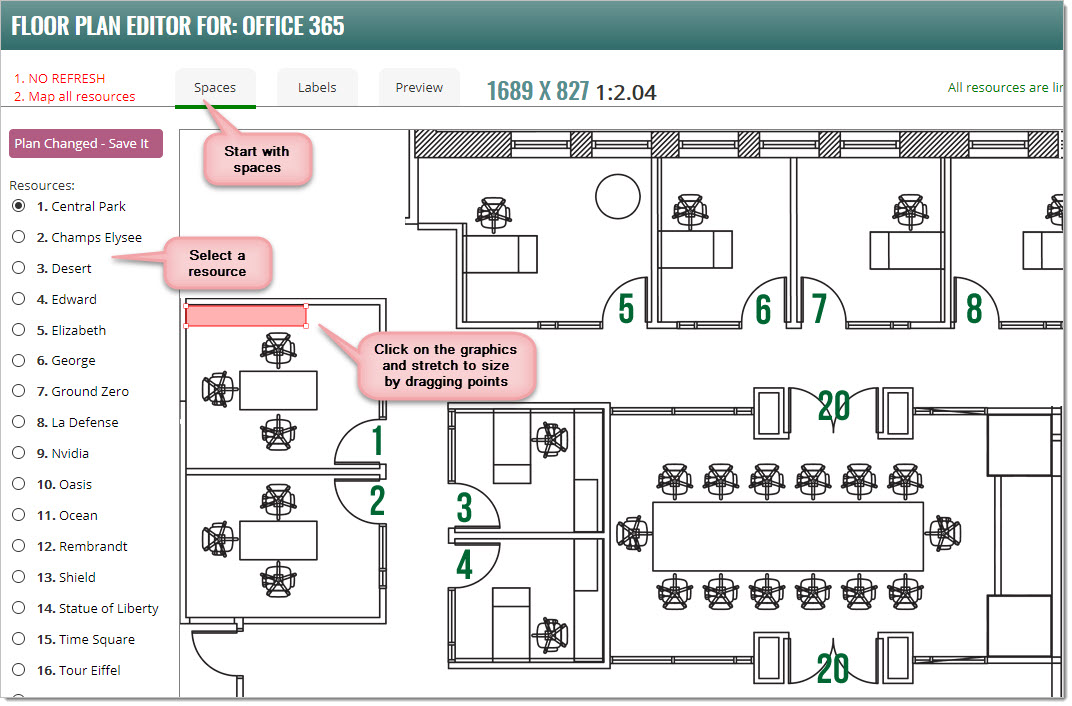
Note: you must draw ALL the resources that participate - failing to do so will result in the inability to review a plan nor use it later.
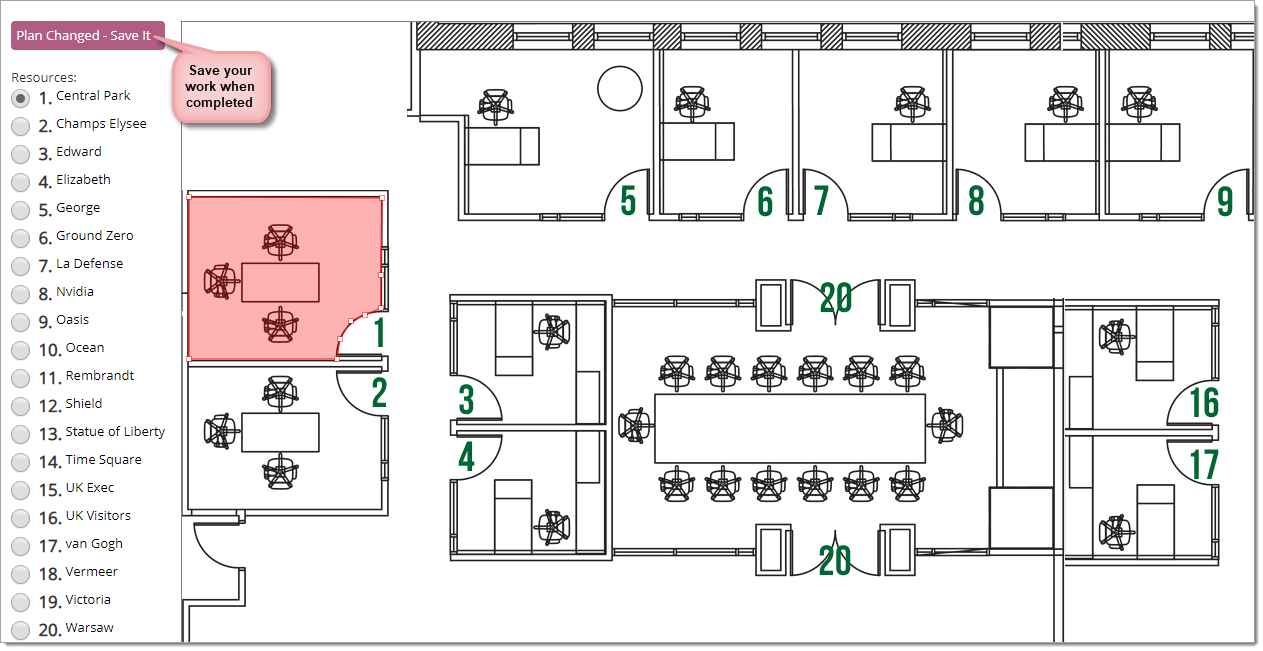
Note: to remove a drawn shape you can click on the "Clear" button below the image. You may also drag dots to adjust your mapping.
Review your work
Once you have finished mapping all resources, save your work and click on "Preview". Move the mouse over areas to check these are correct:
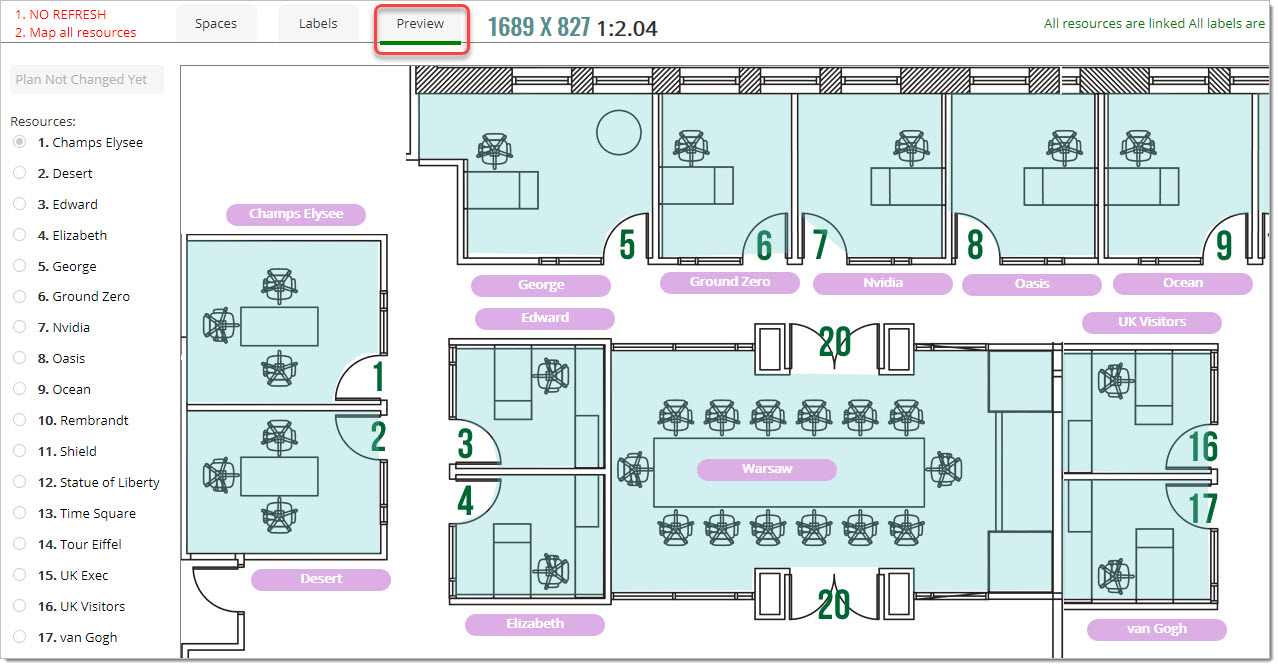
Note: To add labels place holders to your Floor plan designs see here 
Floor plan switching
You can easily set Floor plan switching by listing the Neighborhoods, as follows:

When you set switching the following will show:
- The name, or display name, of participating plans
- The names of the inactive plans in lower opacity
Note: ensure that your names are short so that they fit in the available space, and remember that you can change the text size to meet your requirements.
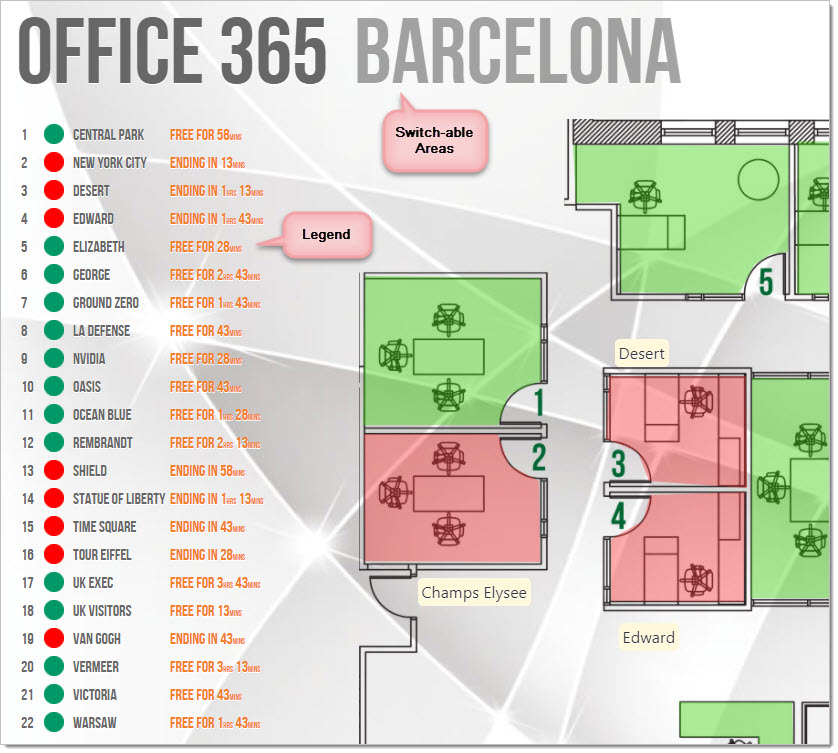
After switching:
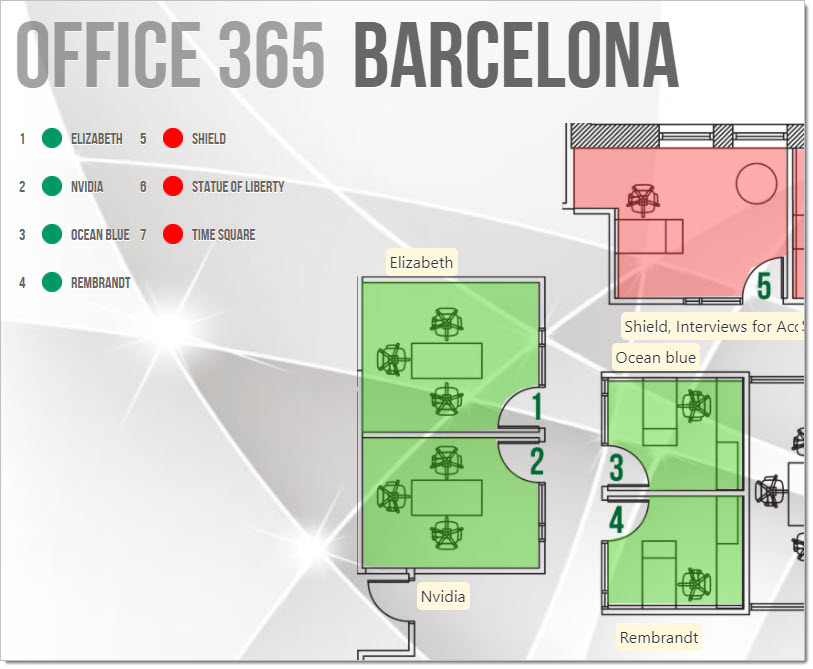 Avoid Jumps
When a Floor plan loads the Door Tablet App will resize your image and place it in the middle of the available space, which causes movement of the image on the screen. This effect is acceptable when you use a single plan as this opens once only. When using a plan, switching such movements should be, and can be, eliminated. To do so, please ensure your images, of all Floor plans, consume the entire available space, in both width and height. The available size will show when you open the Floor plan display for the first time.
Auto Return
The Door Tablet Floor plan display will revert to the initial Floor plan automatically after a duration of inactivity. To control that duration, change this is the system profile:
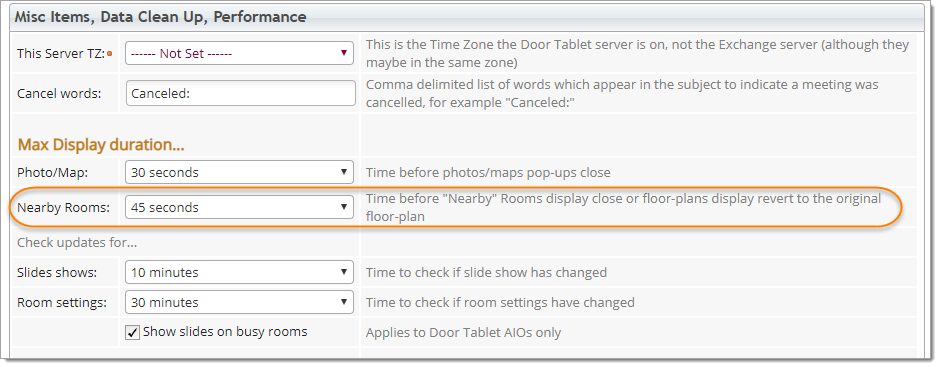 You are here
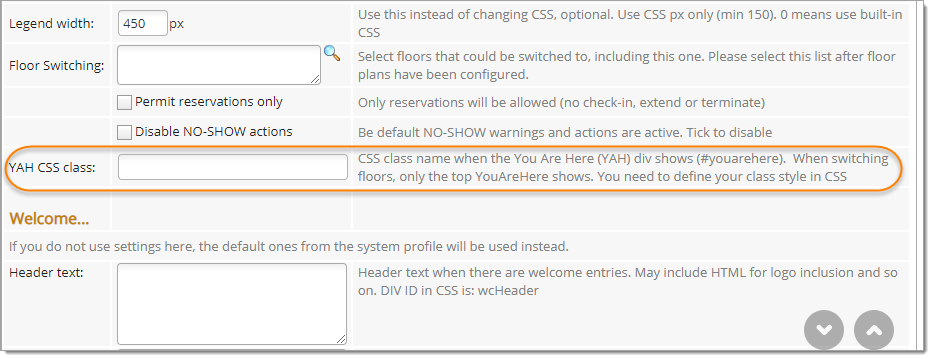
When displaying multiple Floor plans on the same display you may wish to show the "You are Here" graphics so that shows only on the first, base Floor plan. For this purpose you are able to name a CSS class that will contain graphics and placement of it on your display. Door Tablet will use this class for your display and ensure that the "#youarehere" division is hidden when users switch plans. You may name a name a different class for different Floor plans as the location may change depending on the plan. Do this from Neighborhood view in the Web UI, under "Wayfinding Displays, URL Invocation".
