Click on images to see them in full screen
269F28956E60118D80257C27005F148FExchange
To prepare Exchange for effective use of Door Tablet, you need to perform a number of tasks to prepare the environment. These tasks vary depending on the version of Microsoft Exchange you are using. If you upgrade Exchange you should visit this page again.
Most recent version of Microsoft Exchange
As you would expect, Microsoft may change commands from version to version. You can find the latest syntax for commands by performing web searches or browsing the Microsoft help pages for the version you are using, or intending to use. Although Door Tablet is not tested on every version that Microsoft releases, as we use EWS we expect Door Tablet to work on all version of Exchange, and yes, including yours. If you are using Exchange 2019 you can use this document instead 
The tasks cover the following steps:
- Create groups of your meeting spaces, allowing Door Tablet to scan these and import them into the Door Tablet system with a single button click
- Enable Auto meeting processing so that ad-hoc meeting space reservations for Tablets can be immediately approved (Note: you do not have to do this to all meeting spaces)
- All meeting subjects to be passed on to Door Tablet so that these look better on the tablets
In all cases it is assumed that you have already created meeting spaces in your Microsoft Exchange server.
PowerShell Commands
Some configuration items may be performed only with console commands. However, over time you may find that commands have been implemented in Microsoft UI tools. This will allow you to achieve the same result but without using PowerShell. We do not show examples of this here... again, always search Microsoft Help pages.
The following commands should be performed for your installation:
- Add rooms to room lists, use Add-DistributionGroupMember or equivalent
- If users will book rooms from tablets, use Set-CalendarProcessing or equivalent
- To move the subject of meetings from user calendar to a room calendar, use Set-CalendarProcessing or equivalent
- To allow the system to work without impersonation grant the service account the required rights, use Add-MailboxFolderPermission or equivalent
 Using Power Shell in other languages
If you use Power Shell in a language other than English, some command parameters must be translated by you. For example, a command such as
Add-MailboxFolderPermission <room-alias>:\Calendar -User <service-account-name> -AccessRights Editor, the object name "
Calendar" must be typed in your language. Otherwise, Exchange might respond with an error saying the item could not be found.
Microsoft Exchange 2010/2013
In this server, the process of creating a Distribution Group is slightly different from Exchange 2007, listed above. The object you will be creating is a "Room List Distribution Group".
Your meeting spaces must already be existing in Exchange.
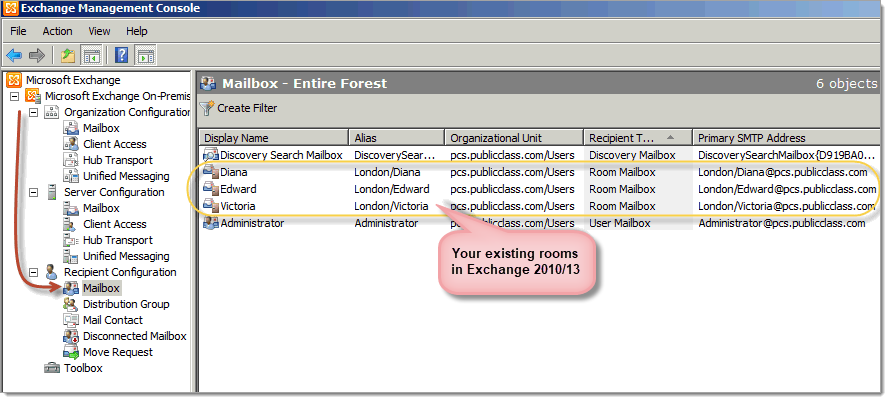
To create a
Room List Distribution Group you use a Shell Command using the Exchange Management Shell:
Syntax:
$Members=Get-Mailbox -Filter {(RecipientTypeDetails -eq "RoomMailbox")}
New-DistributionGroup -Name "group_name_here" -OrganizationalUnit "unit_name_here" -RoomList -Members $Members
For example:
$Members=Get-Mailbox -Filter {(RecipientTypeDetails -eq "RoomMailbox")}
New-DistributionGroup -Name "DoorTabletRooms" -OrganizationalUnit "pcs.publicclass.com" -RoomList -Members $Members
Result, as viewed in the Exchange Management Console:
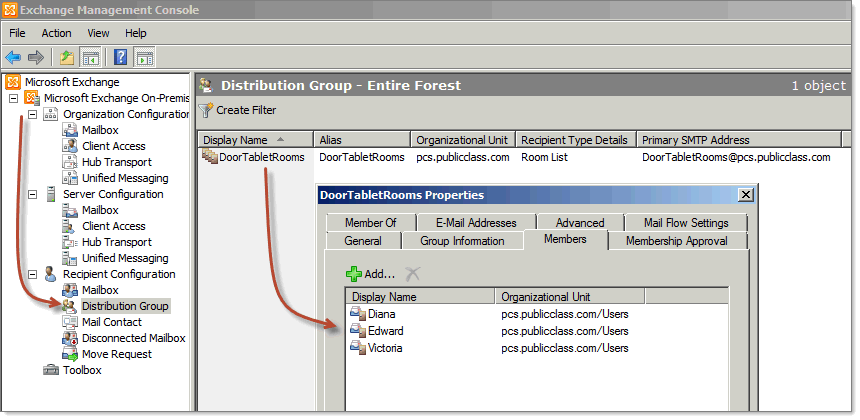
Should you need to add another meeting space later, do this like so:
Syntax: Add-DistributionGroupMember -Identity "group_name_here" -Member room_email_here
Example: Add-DistributionGroupMember -Identity "DoorTabletRooms" -Member London/Victoria@pcs.publicclass.com
Setting up Auto Processing
Syntax: Set-CalendarProcessing -Identity "identity_name_here" -AutomateProcessing AutoUpdate
Example: Set-CalendarProcessing -Identity "DoorTabletRooms" -AutomateProcessing AutoUpdate
Enabling meeting subjects
Syntax: Set-CalendarProcessing -Identity "room_alias_here" -DeleteSubject $false -AddOrganizerToSubject $false
Example: Set-CalendarProcessing -Identity "Diana" -DeleteSubject $false -AddOrganizerToSubject $false
Impersonation
In order to allow the administrator, listed in the Door Tablet system profile, to access room calendars, it needs to be assigned the impersonation rights, as follows:
Syntax: new-ManagementRoleAssignment -Name:impersonationAssignmentName -Role:ApplicationImpersonation -User:'administrator_email_here'
Example: new-ManagementRoleAssignment -Name:impersonationAssignmentName -Role:ApplicationImpersonation -User:'administrator@pcs1.door-tablet.com'
See also:
http://msdn.microsoft.com/en-us/library/bb204095.aspx
Avoiding Impersonation option
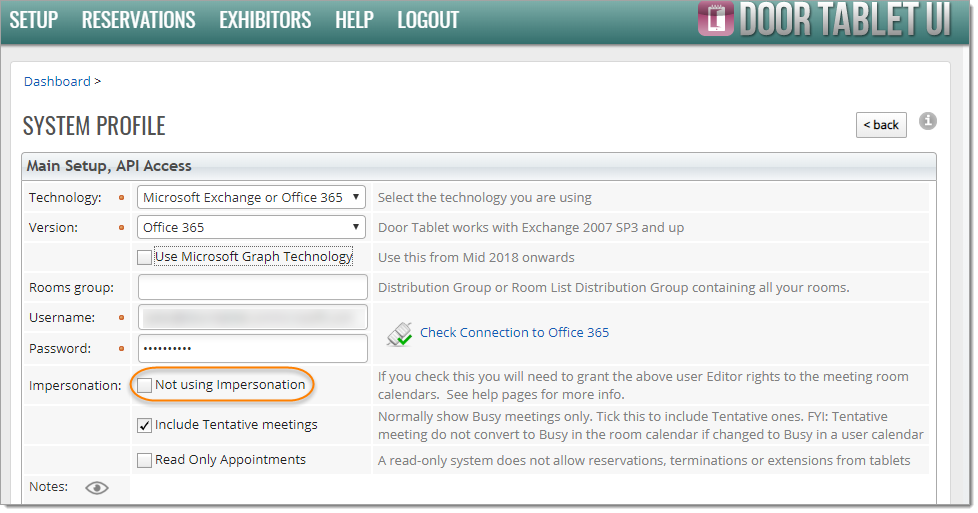
From V8.4.11 you may enable Door Tablet to access your resources without using Impersonation. Impersonation makes it easy for you to handle a large number of meeting spaces without the need to remember to grant the service account rights to the resource calendars. If you wish to avoid Impersonation, grant the service account editor rights to the resource calendars, as follows:
Add-MailboxFolderPermission <room-alias>:\Calendar -User <service-account-name> -AccessRights Editor
For example:
Add-MailboxFolderPermission Amsterdam:\Calendar -User doortablet -AccessRights Editor
In the system profile check the following box:
Command issued in PowerShell:
Get-Mailbox Amsterdam | % {Get-MailboxFolderPermission "$($_.Alias):\Calendar"}
 Microsoft Exchange 2016 and up
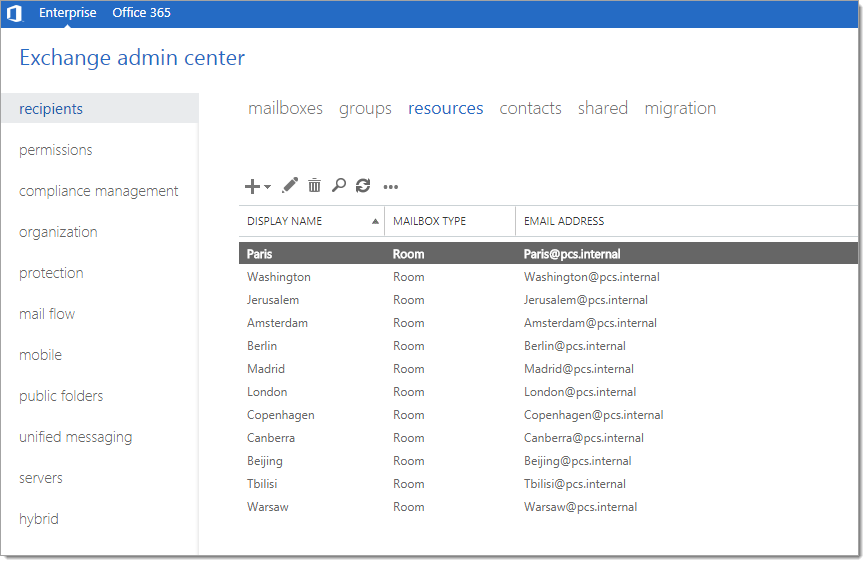
With this version of Exchange the User Interface has moved to a browser. Same actions as described for Exchange 2010/2013 above are still required. In addition, to access Exchange 2016 you will also need to specify the Windows Domain name (between user name and password), to enable authentication.
Your meeting space and resources look like that:
 Create a Room Group
You can create the meeting space list group, partially using the web interface, but you will need to issue a comdLet to convert the group to a "RoomList". Use this command:
Set-DistributionGroup -Identity “UK Rooms” –RoomList
Create a Service Account
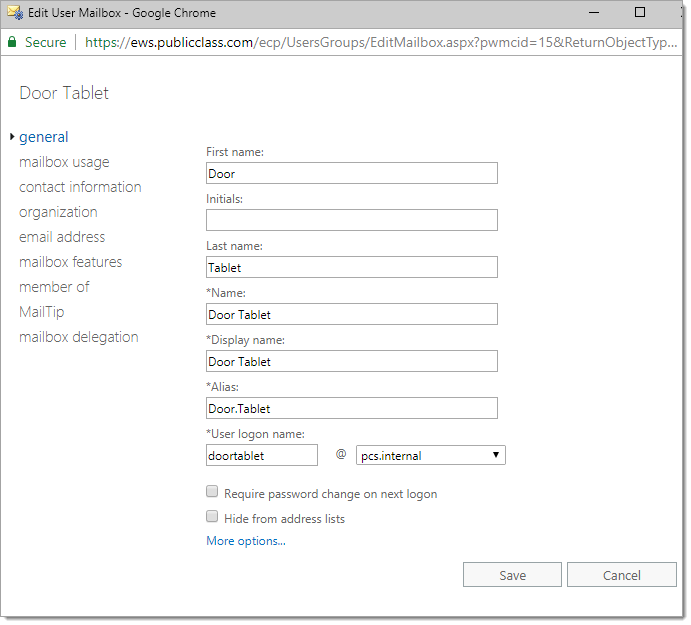
You can use any user for the purpose of authenticating the Door Tablet server with Exchange. However, we recommend you create a new user for this purpose.
 Note:
Note: you may skip Impersonation when using Exchange 2016, too. See above.
Verify your installation
If you are not getting the correct result when connecting to Exchange or Synchronising rooms, try EWSEditor
 Microsoft Exchange 2007 SP3
In this version you need to group your meeting spaces in one Distribution Group.
Your meeting spaces must already be existing in Exchange:
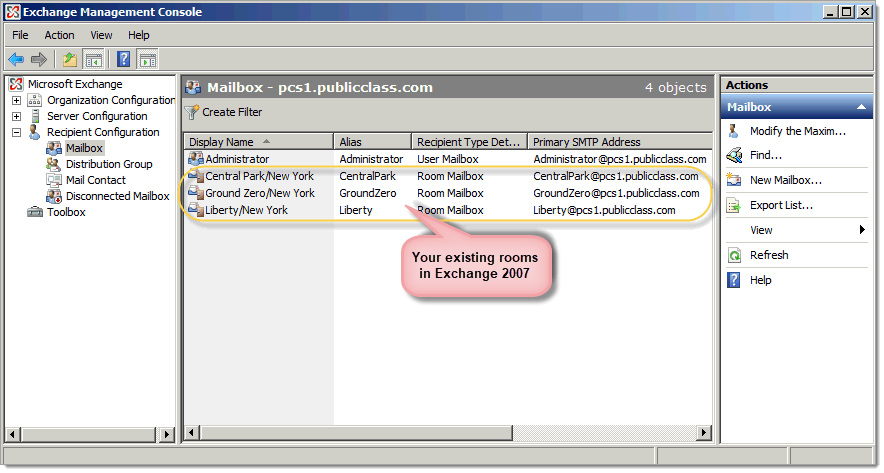
Create a "Distribution Group" and add all your meeting spaces to it:
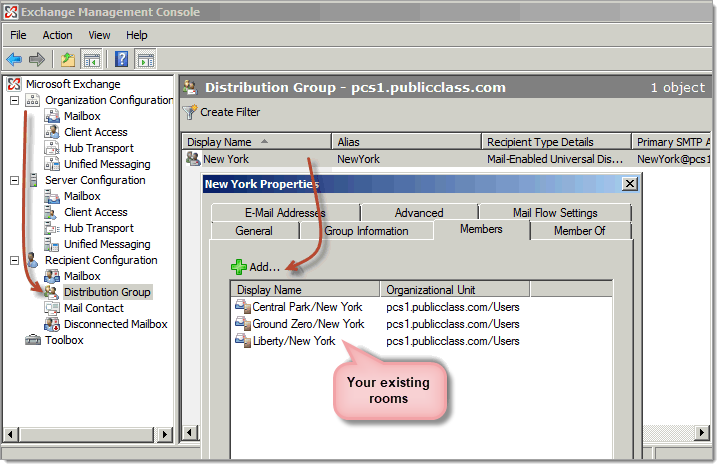
Make a note of the Email Address of the newly created Distribution Group. In the System Profile of Door Tablet insert the email address to the Rooms group field. Door Tablet will use its members as the meeting spaces you wish included in it.
Not seeing meetings?
In the event you cannot see meetings and you wonder if there is a connection problem, do the following:
- Include Tentative meetings - see first check box in the above image
- Enable Reservations in your meeting space records, and try to create a reservation from the tablet
Enabling meeting subjects
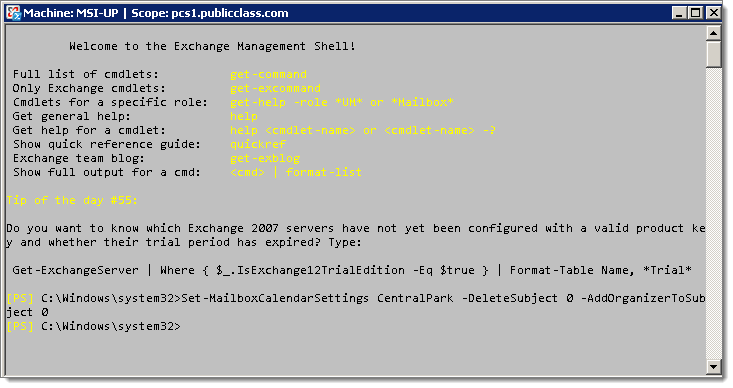
In order for meeting subjects to be seen by Door Tablet, you will need to issue some commands using the Microsoft Exchange Management Shell
Syntax: Set-MailboxCalendarSettings resourcename -DeleteSubject 0 -AddOrganizerToSubject 0
For example:
Set-MailboxCalendarSettings CentralPark -DeleteSubject 0 -AddOrganizerToSubject 0
 Access Rights
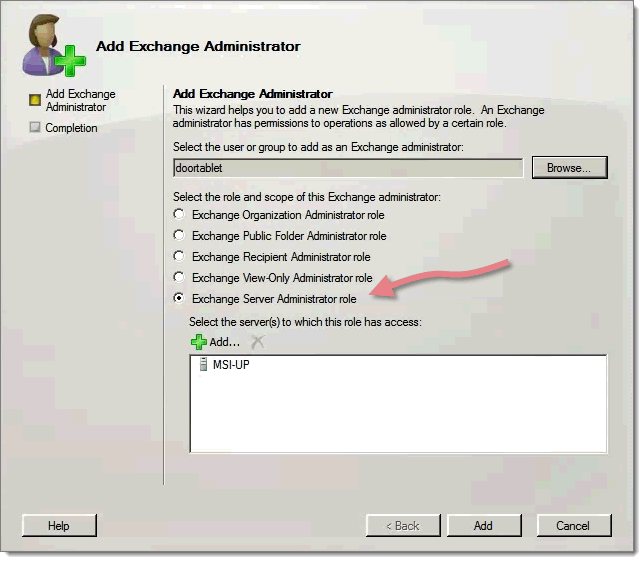
In Exchange 2007, we found that it is sufficient to define the user you specified in the system profile as an Exchange Server administrator. This allows Door Tablet to access all meeting space schedules. If you define the user as a lesser administrator then you are likely to require further set-up comdlets.
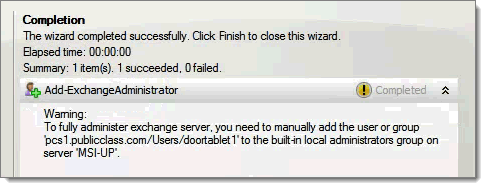
You may get the following result but this does not seem to have a negative impact.
Please consult this page for further commands:
https://technet.microsoft.com/en-us/library/aa996340(v=exchg.80).aspx