n
anonymousdoortablet/dthelp.nsfdomino-cross-certified
Protected content
| 263pages | Our help system contains many pages and videos for you to consume. This includes the complete information on how Door Tablet works, all its features and options, and of course the many benefits for your business. Door Tablet School offers many videos too. |
|
 |
| 
Click on images to see them in full screen
9F8C30E1E3C585AD802589DF003C8C2ECross Certified Servers
Door Tablet may run as a stand alone server and connect to your Domino Resource Reservation Server through the advent of Cross Certification.
Overall steps
- Install the Door Tablet Server on a PC on your network
- Cross Certify the Door Tablet server with your server on your Domino domain. See below
- Create a connection record from the Door Tablet to your Server. Your server will be the Resource Reservation server
- Open a firewall port 1352 to allow traffic from the Door Tablet server to your Server
- Update the ACLs on your Domino server to grant access to the Door Tablet server
- Test the connections
Install the Door Tablet server on a Windows PC
The Door Tablet server needs to be installed on a machine the will have an IP line of sight to your Resource Reservation Server. Your server may run on other operating system but Door Tablet must run on Windows.
Please download and install the software as shown here:  Basic configuration
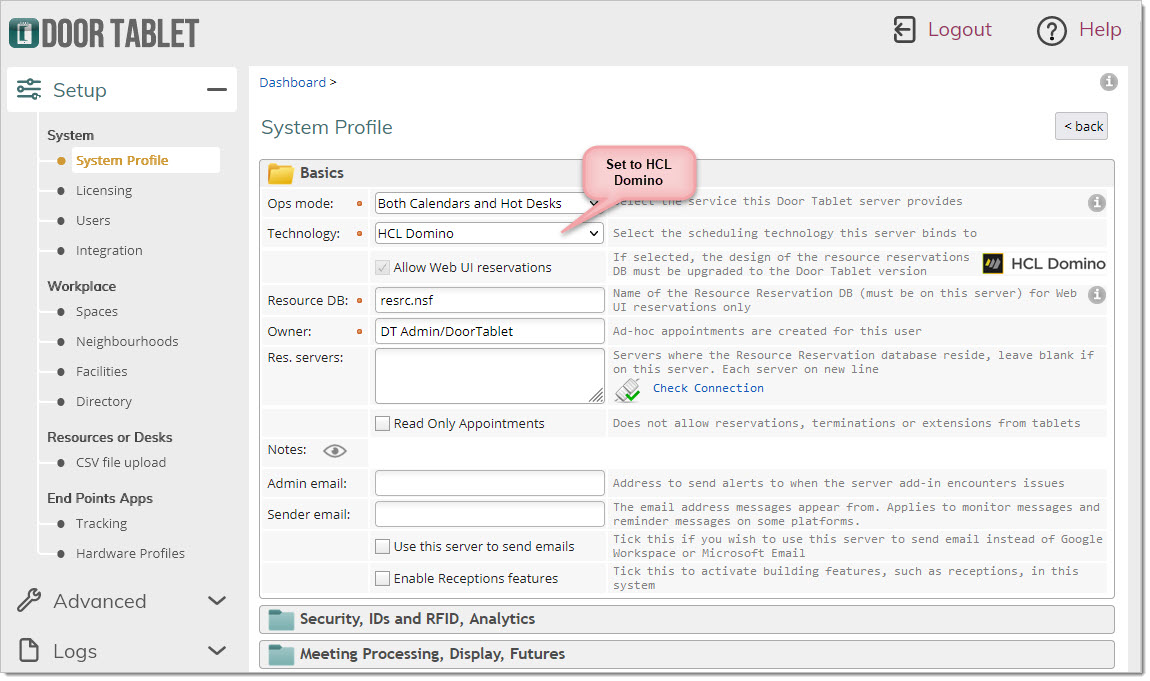
- Set your system to use HCL Domino
- Submit the record
 Create a connection to the target server
In order to establish a connection to your server, you need to create the server on the Door Tablet System and then create a connection from the Door Tablet server to your server.
Create a connection to the target server
In order to establish a connection to your server, you need to create the server on the Door Tablet System and then create a connection from the Door Tablet server to your server.
- Define a server for the resource reservation server. This will be the server in your domain
- Create a connection record from the Door Tablet Server to the above server
Go to Server Connections
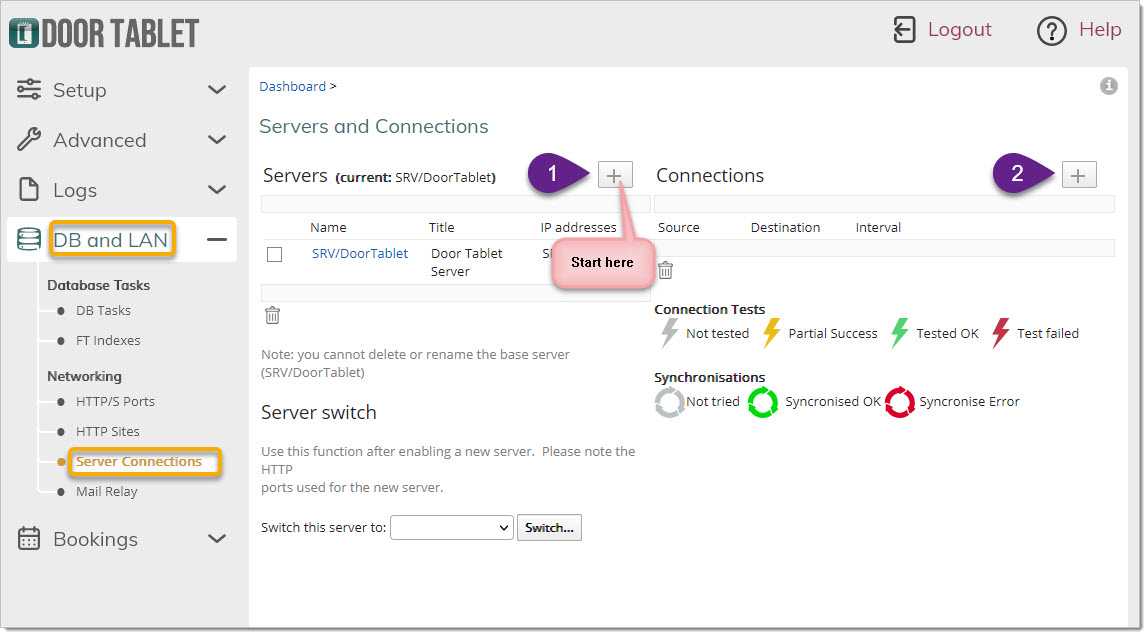
Create a new server representing your internal server. Click on the + button to the right of the label Servers:
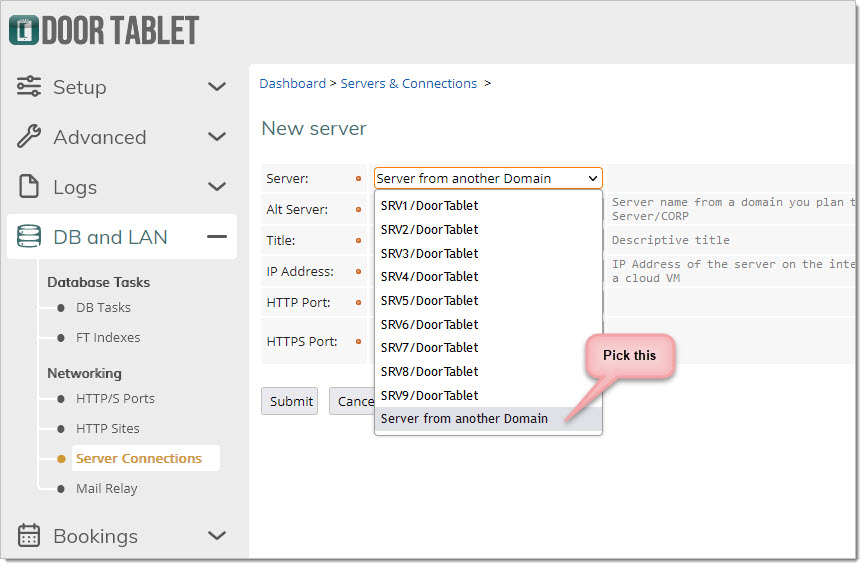
Fill the form as follows and Submit. Note that in this case we are using a remote server in the PCS domain for the sake of testing. Use your own server name.

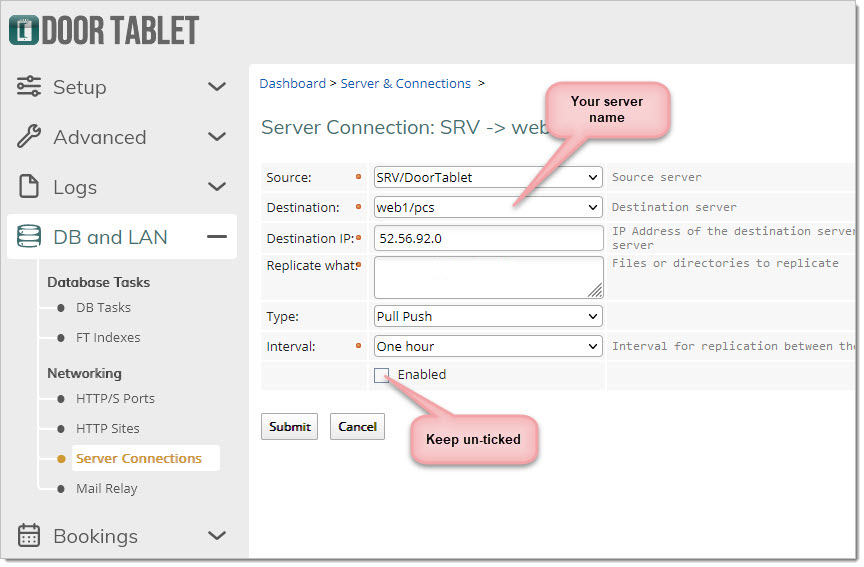
Create a connection
Click on the + sign on the right to create a connection. Leave the Enabled check-box unchecked - we are not going to use it for mail routing or replication
 End result
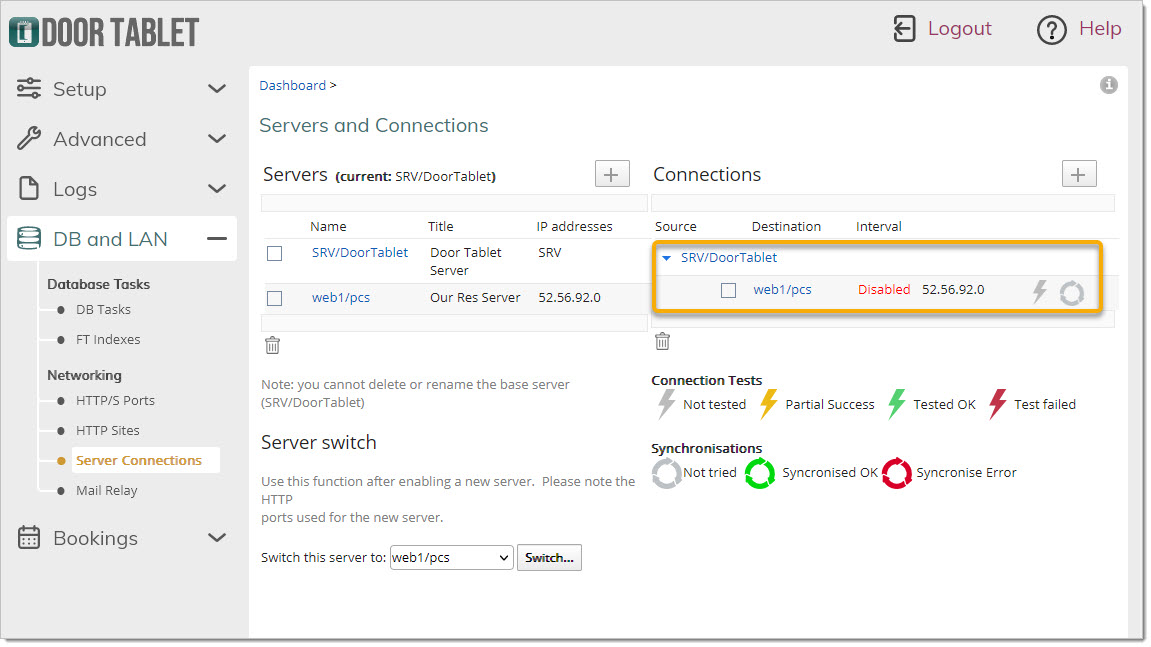
You now have the connection record you need in order for the Door Tablet server to be able to connect with your server:
 Using the server
Now, in order to use the above connection we will need to specify this in the System Profile. If we try this before implementing cross certification the connection will fail:
Using the server
Now, in order to use the above connection we will need to specify this in the System Profile. If we try this before implementing cross certification the connection will fail:
 If you examine the server console log a more detailed message will show:
Error connecting to server web1/pcs: Your Address Book does not contain any cross certificates capable of authenticating the server.
If you examine the server console log a more detailed message will show:
Error connecting to server web1/pcs: Your Address Book does not contain any cross certificates capable of authenticating the server.
Cross Certification
This process has to be done for both the Door Tablet server and your server. The certification is done at server level only. The following steps are required:
- Create a Safe ID of your server
- We will provide you with a Safe ID of the Door Tablet server - attached below
- Send us the Safe ID with the "names.nsf" database created during the Door Tablet server installation
- We will embed the cross certificate in the names.nsf file and send it back to you
- You use our Safe ID to embed the cross certificate in your server's names.nsf
To implement the Safe ID on the Door Tablet server you will need to send us the following:
- Your server's Safe ID
- The file "names.nsf" from the new Door Tablet server you installed. This will be in the data directory
After we get the above, we will implement this in the names.nsf file, and send it back to you.
To create a Safe ID, use the Domino administrator and follow these steps:
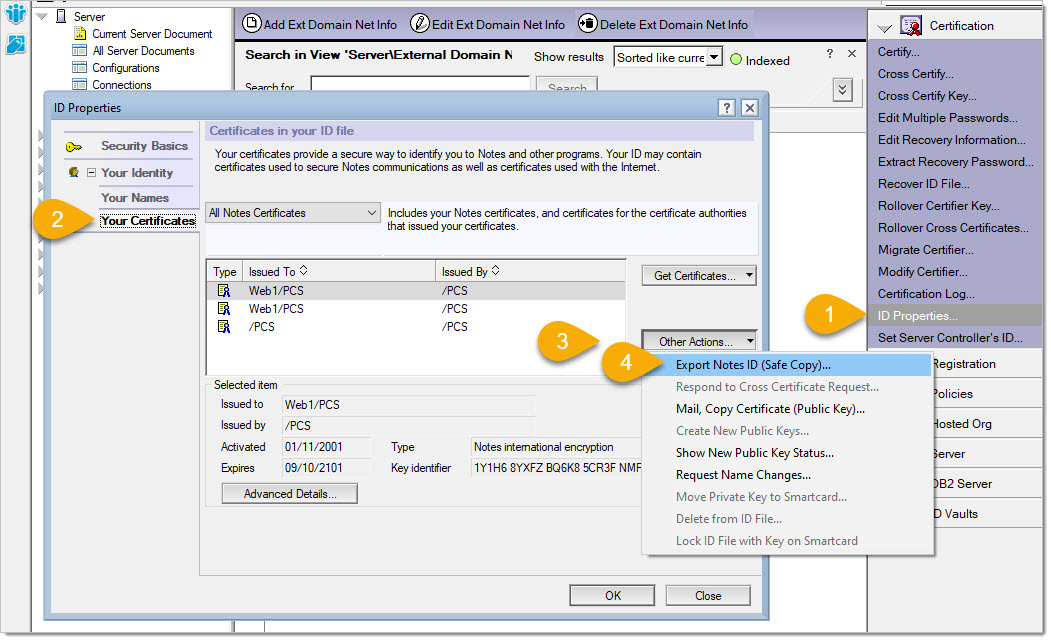 Action...
Email the following files to support@door-tablet.com
Action...
Email the following files to support@door-tablet.com
- The new Safe ID file
- The names.nsf file from the Door Tablet server installation
Use the Safe ID we created to implement on your server. Right click on the link and select "Save Link As", or similar.
 safeID-srv-doortablet.ids
Implement the Safe ID on your server
Using the Domino Admin...
safeID-srv-doortablet.ids
Implement the Safe ID on your server
Using the Domino Admin...
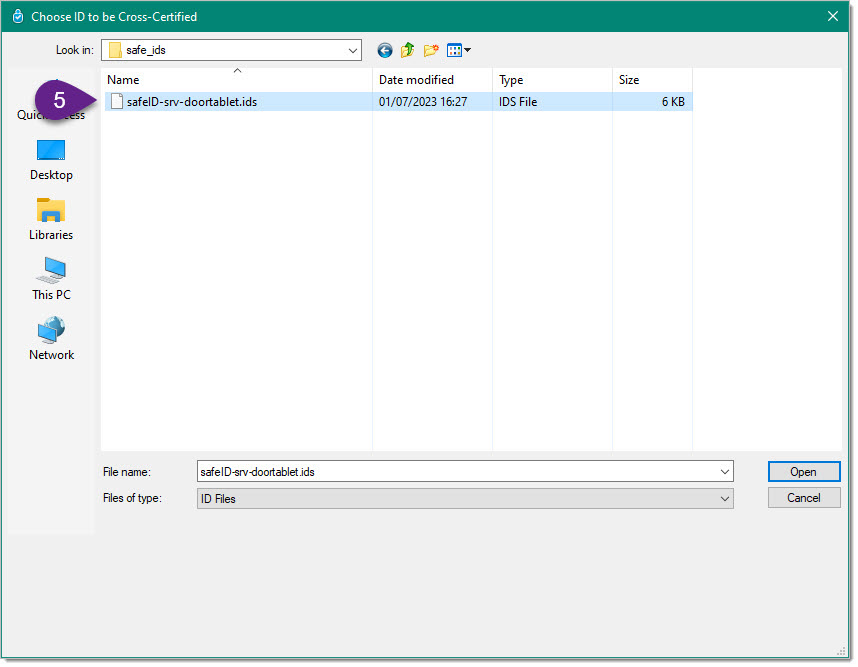
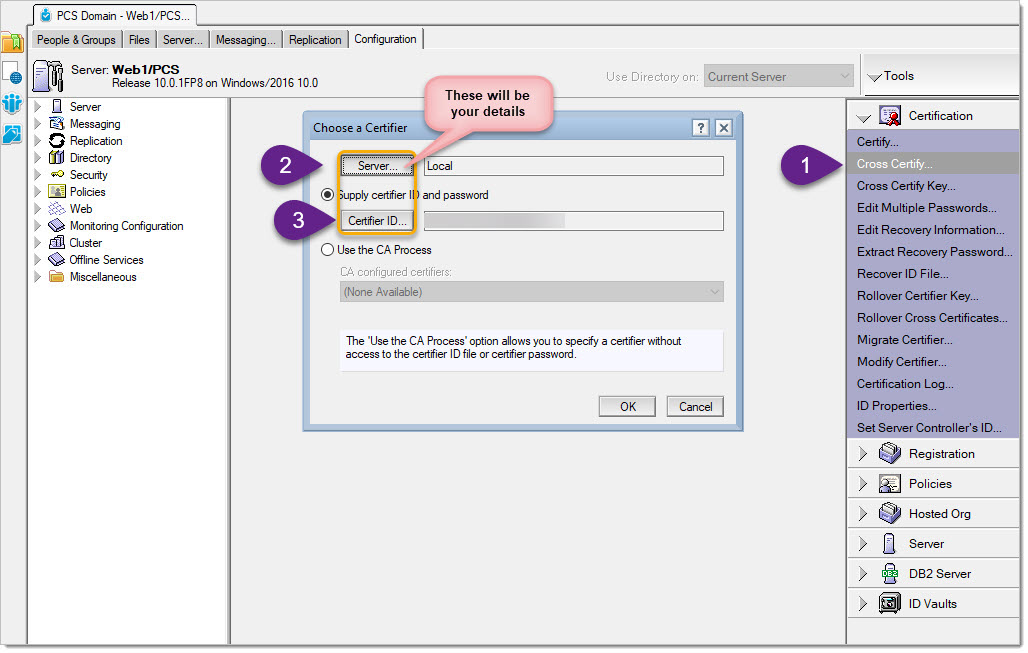 Click on OK and then select the safe ID file we provide:
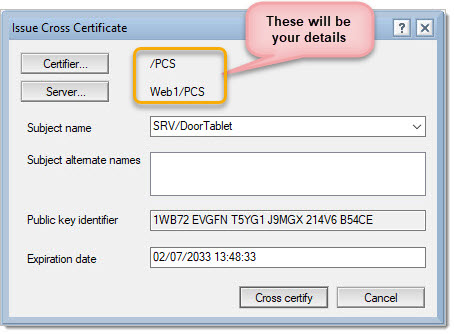
 Accept and Cross Certify:
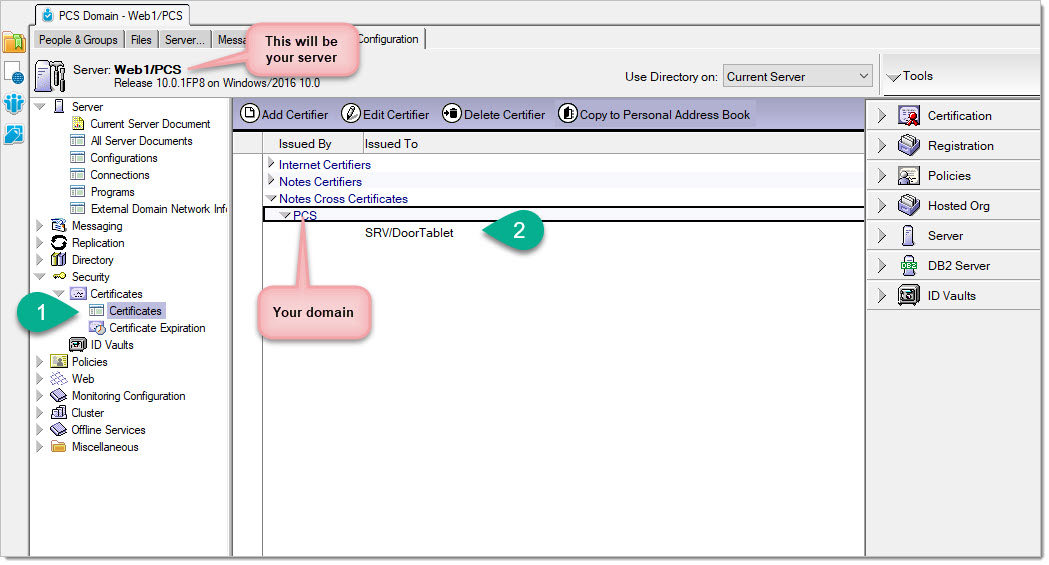
 The end result should look like so:
 Update you ACL and the server security tab
Door Tablet required full editorial rights to your resource reservation database, and read access to a view in your directory:
- Change the ACL of the Resource Reservation database to include srv/DoorTablet as editor
- During automatic synchronisation of resources, Door Tablet access the ($rooms) view in your names.nsf. You may need to add srv/DoorTablet as a reader of ($rooms)
Adding Access Control List Group and including it in ACLs
In this step we are authorising the Door Tablet server to access your server. This will be required:
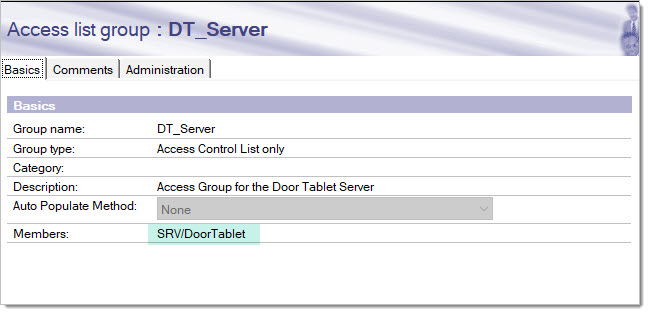
- Create a group used for Access Control only, and list the Door Tablet server in it: SRV/DoorTablet
- Used the new group in a number of places: server security and ACLs
Creating a group
Use any name you like for the group name:
 Use the new group in your Server's Security tab:
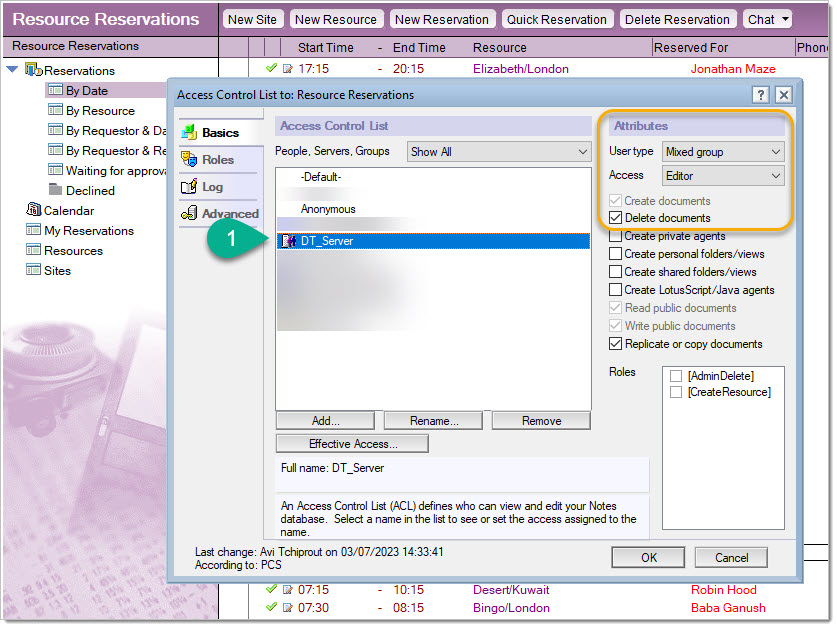
 Update the ACL in the Resource Reservation database
Set the attribute for the group as shown below. For certain calendar changes the Delete documents is required as Door Tablet will delete a record and create it again. Bookings will always remain on the Resource Reservations database, even for NO-SHOW records.
Update the ACL in the Resource Reservation database
Set the attribute for the group as shown below. For certain calendar changes the Delete documents is required as Door Tablet will delete a record and create it again. Bookings will always remain on the Resource Reservations database, even for NO-SHOW records.
 The $rooms view
Note: the Door Tablet server reads the $rooms view in names.nsf. If the ACL of names.nsf is strict you will need to modify that ACL to allow the Door Tablet server to Read the database, and if you wish to restrict it even further you can update the properties of the $rooms view directly.
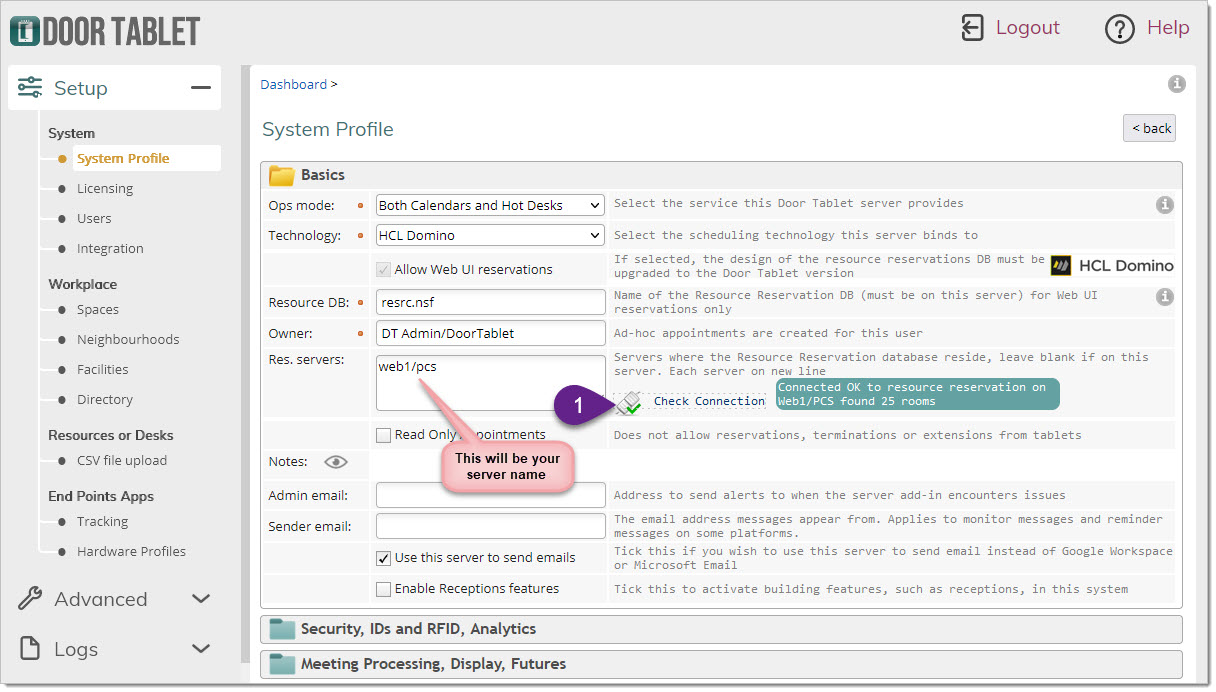
Test the access from Door Tablet to your Resource Reservation server
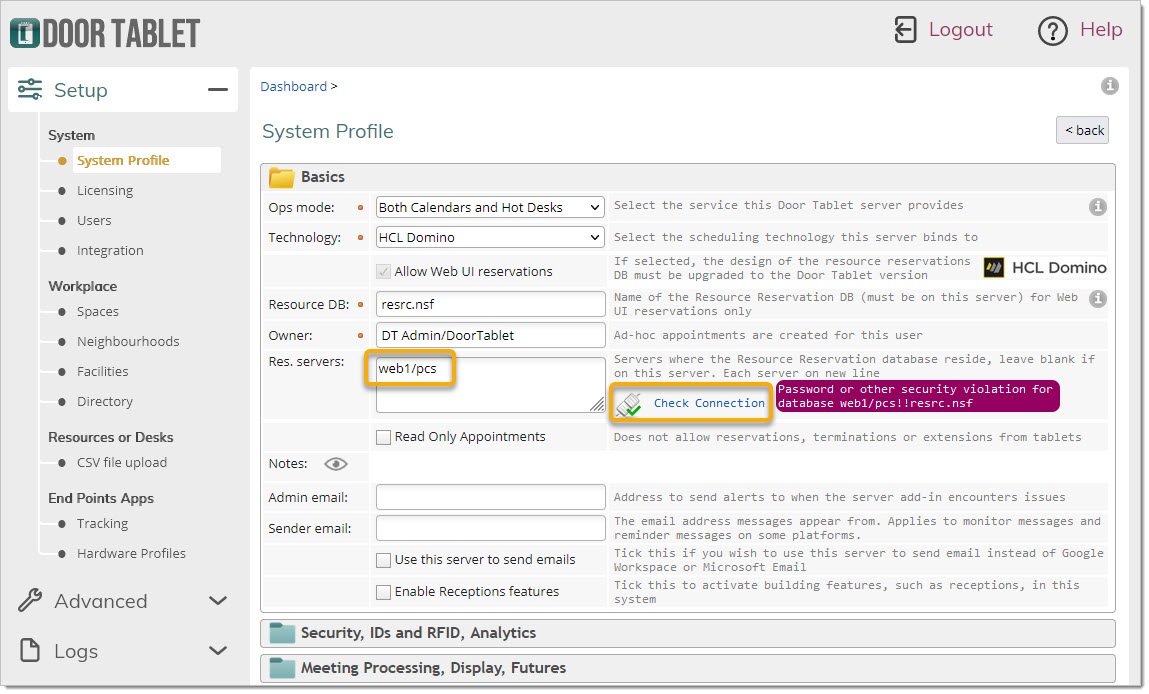
You are now ready to test the access from the Door Tablet System Profile. Type your server name in the box as showing below:
The $rooms view
Note: the Door Tablet server reads the $rooms view in names.nsf. If the ACL of names.nsf is strict you will need to modify that ACL to allow the Door Tablet server to Read the database, and if you wish to restrict it even further you can update the properties of the $rooms view directly.
Test the access from Door Tablet to your Resource Reservation server
You are now ready to test the access from the Door Tablet System Profile. Type your server name in the box as showing below:
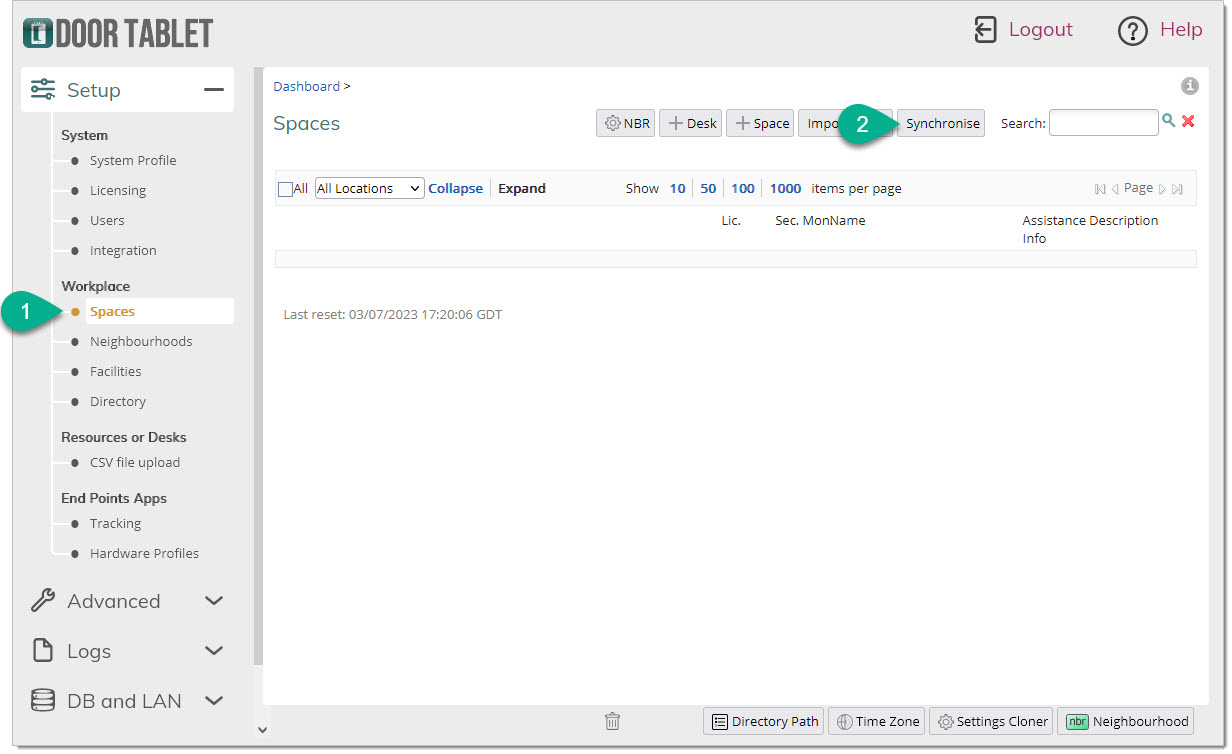
 Synchronising
You are now ready to bring your meeting spaces into Door Tablet.
Switch to the Spaces view and click on
Synchronising
You are now ready to bring your meeting spaces into Door Tablet.
Switch to the Spaces view and click on
 Door Tablet will read the rooms from your server and inserts these in. The rooms will be inactive so that you may activate only the rooms you wish to use.
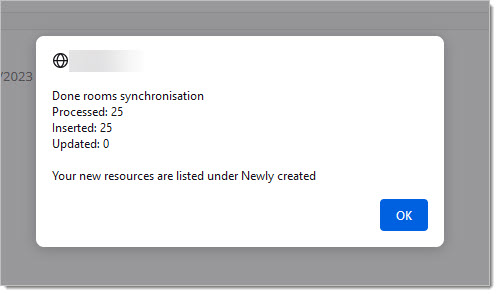 The result...
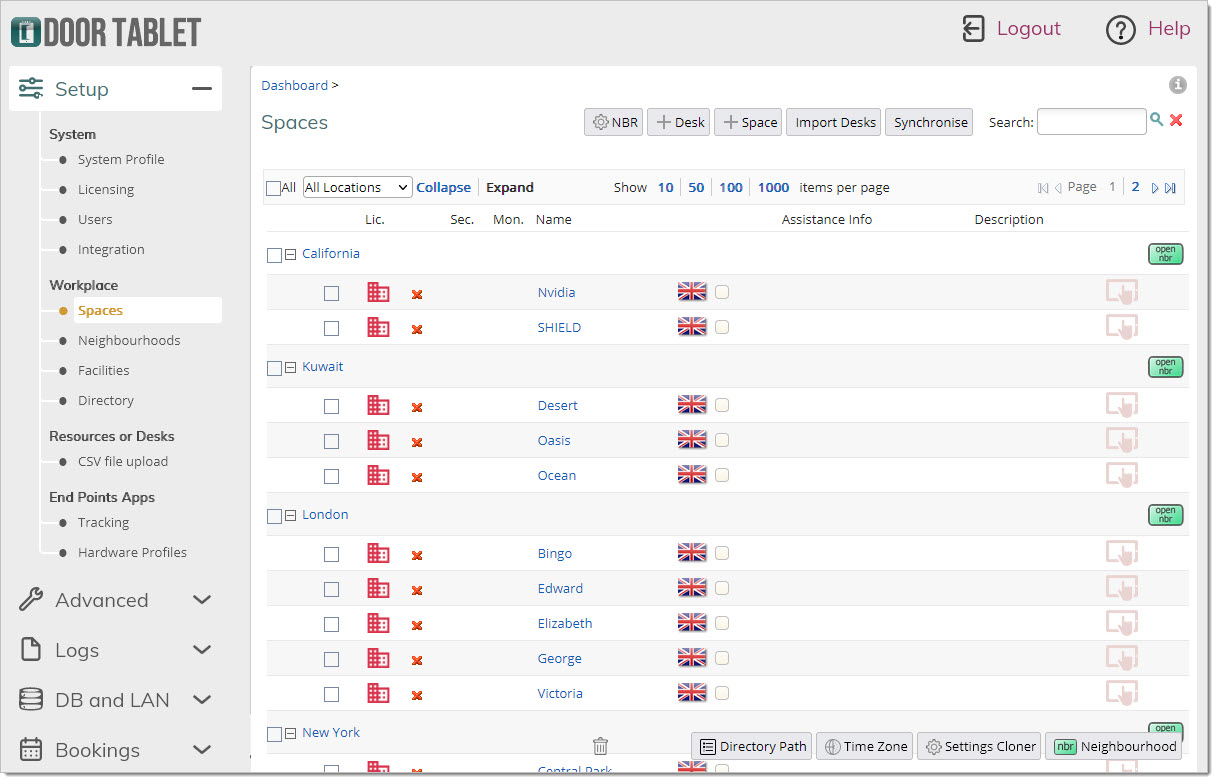 You are now ready to activate and set-up rooms.